


Sahi Pro - Sahi Script Editor
It allows conversion of steps into parameterized functions and extraction of constants.
Launching the Editor
Editor can be launched by clicking on the Editor link from Sahi dashboard.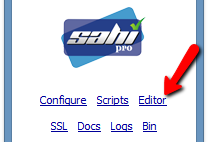
It can also be launched from the Sahi controller to edit the currently recorded script.
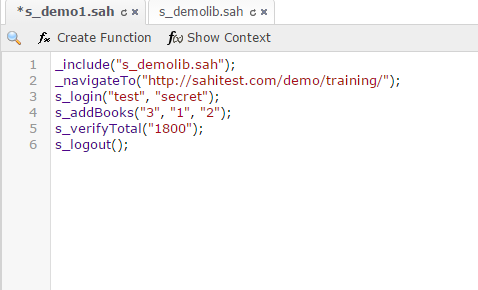
 A typical editor window will look like this.
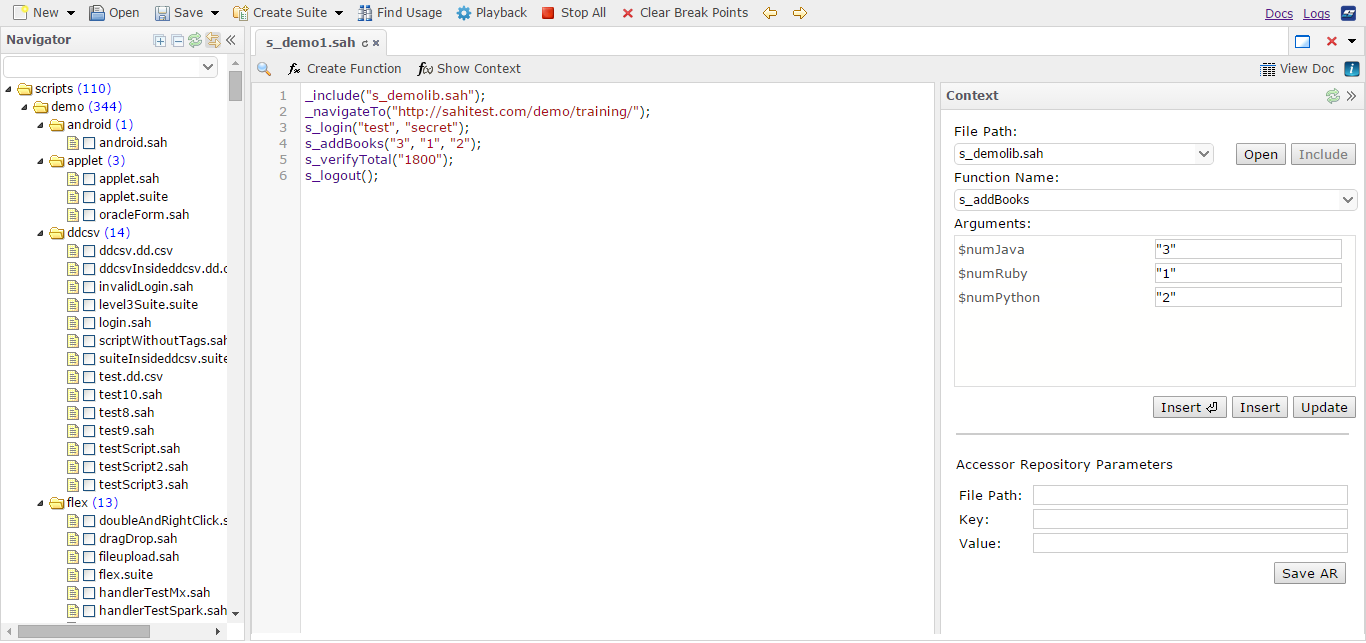
Navigator
This is the left-most panel in the editor and shows all the scripts, suites and other files in the scripts directory.

At the top of Navigator, there are three buttons. You can use them as follows:
 Refresh: This button is used to refresh the directory so that newly added scripts are visible.
 Link to Editor: If active, the name of script being edited will be scrolled to in the navigator menu.
 Collapse: This will collapse the navigator and provide some additional space for the script editor.
 Expand All: This will expand all scripts and sub-folders.
 Collapse All: This will collapse all scripts and sub-folders.
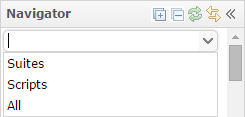
The filter at the top of navigator is used to filter scripts based on the entered text. It can also be used to filter all suites and scripts.
All the scripts and suites are listed in a tree menu in the navigator.
If you click on the name of a script or suite, it will open up for editing in the script editor.
Also, if you right click on the name of script or suite, following menu is available.
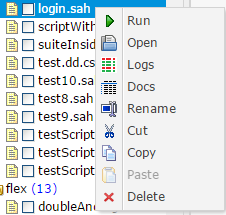
Run: If playback properties are configured, it will start script execution. If not, it opens up the playback properties window. Once executed, scripts can be stopped by clicking on the "Stop All" button in the top menu.
Open: Opens the current file.
Logs: Opens the HTML logs for the current script.
Docs: Opens the script in documentation mode.
Rename: Makes the filename editable.
Delete: Deletes the file.
Cut: Cut the current file.
Copy: Copy the current file.
Paste: Paste the cut/copied file.
Script Editor
Script editor provides an interface to edit the Sahi scripts within a browser window.
The editor integrates with function creator and context editor to provide an easy interface to refactor the scripts. To edit a script, simply select the script from the navigator and start editing in the editor. Editor provides different interfaces for scripts, scenario and suites.
Errors in Scripts
The script editor also shows if there are any errors in your scripts. It shows a red cross sign at the line containing error. If you hover on the cross sign, it shows you more detail about the error.
 You can click on up and down arrow to move to next or previous error.
Context Panel
Context editor provides the ability to include any function from the scritps directory to the current script and include the file containing the function. It also allows changing the Accessor Repository parameters. You can open context editor by clicking on the show context button.Function Details

- Search for the function name.
- Select the file from which function is to be used. It is possible that same function is defined at multiple places.
- Provide the values for arguments.
- Click on Insert button to insert the function.
- In you want to insert the function call, end it with a semi-colon and move to next line, click on this option.
- You can also update the values of arguments and click on update button. This will update the values in script.
- If you want to open the file containing functions, you can click on Open button to open this file as a new tab.
- If the file containing function is not included, it shows up in red color. Click on include button to include the file.
To lookup the details of a function or Sahi API, you can CTRL+click on the name of function or API in the editor. This will open up the context editor with the details of the function or API.
Accessor Repository Details
If the script is using an Accessor Repository (AR), the AR parameters can be modified by pressing CTRL key and clicking the line of code with object.
This populates the Accessor Repository parameters. One can edit the AR value. To edit the key use the Find Usage dialog.

Click here to know more about recording with Accessor Repository.
Traversing between files while function lookup
- CTRL-Click on a function or AR key, opens its details in the Context Panel.
- In Scenario files, CTRL-Click on Key Word opens the Function Details dialog.
- Clicking the
Openbutton near the filepaths in the above dialogs, opens the relevant included file at the relevant line. - CTRL-Click on file paths in _include lines, or in loadSahi lines in Scenario files, opens the file in Editor.
Function Creator
To create a function out of the statements in a script, select the statements and then click on create function button.
The following window will pop up. Provide a function name and click on continue.
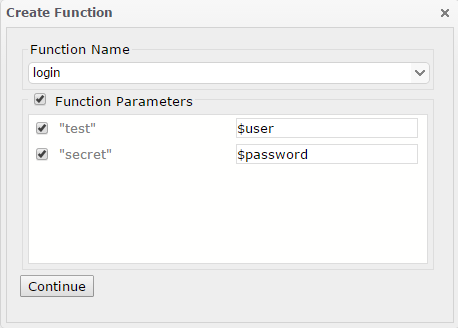
You can also provide function names in
userdata/config/function_names.txt file and select one of these while creating functions. This file can be edited using the Configure link on Dashboard and then selecting the file name from left navigation.Search
To search within a script, click inside the editor and then use either the search icon in the menu or CTRL + F to bring up the search bar.
Find and Replace
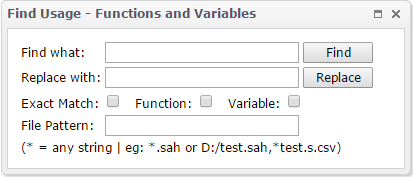
SearchTo search usage of a function or variable across multiple scripts, click on the Find Usage button on the top navigation bar. The following search window will appear.
 Provide the string to search for and click on Find button. You can also select the string from the script opened in the editor and it will set that value for search field automatically. It displays the searched results as follows:
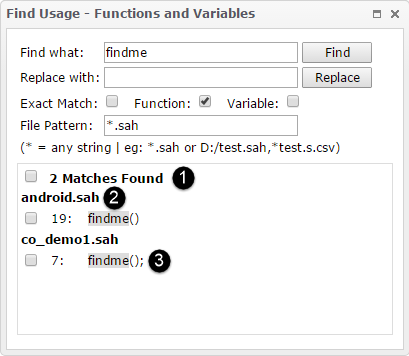
1. Shows the number of results found for the search. The checkbox at left will select all the files.
2. Shows the name of file in which search text was found.
3. Shows the line number where search text was found.
To search for usage of a function across the scripts folders, select the checkbox for function while searching.
To search for usage of a variable across the scripts folders, select the checkbox for variable while searching.
If you want to perform an exact match in search, select the textbox for exact search.
If you want to search in specific set of files, you can provide the regular expression pattern in File pattern. For example, if search is to be performed only in .sah files, you can use *.sah as expression.
Replace
To replace a function or variable, search for the function or variable first. Once the results of search are available, provide the string which will replace the searched text in Replace With box.
Select the files in which replacement is to be done. If you want to make the change in all the files, select all files by clicking the top checkbox. Click on Replace button and Sahi will show you an alert asking if you want to actually replace.
Click Yes to replace and Cancel to Cancel the operation.
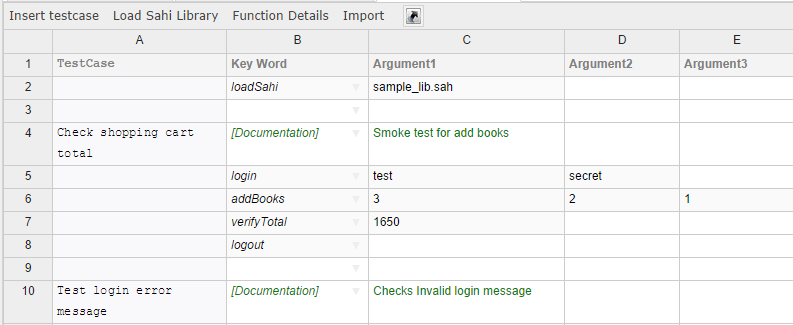
Scenario Editor
Scenario file can be created in two variations in Sahi.Starting from Sahi Pro 6.1.0, a new format as shown below is introduced. This allows for adding additional columns. The example below shows two additional columns Comments and Tags added to the file.
A column with heading as "Tags" has a special meaning and will allow you to select the tags during execution.
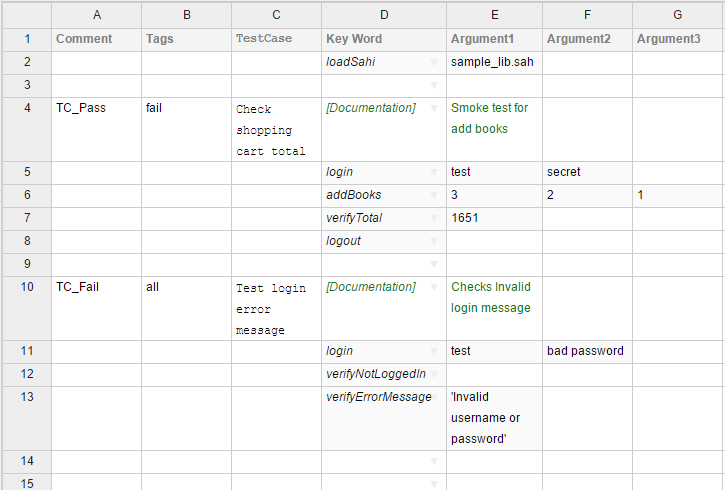
To edit a scenario file, just click on the file name from navigator. The CSV file is displayed in an excel like grid where it can be edited with the help of tools available to this view. In the second format, you can insert comment in column A and tags in column B. While playback, you can provide the tags as an expression using binary operators. Sahi will evaluate the expression and run the scenarios which qualify the condition in tags.
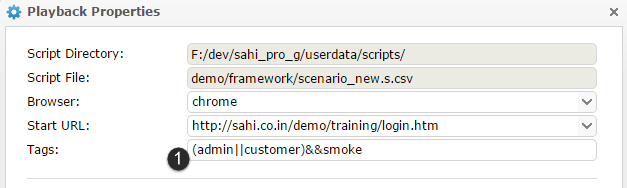 In the image above, the scenarios with 'admin' OR 'customer' tag AND with 'smoke' tag will be filtered out and executed.
Following tools are available while editing a scenario file.
1. Insert Testcase: Inserts a blank test case

2. Load Sahi library: Inserts the syntax to include a function library.
You can press CTRL and click on the name of included file to open it up in a new tab of editor.

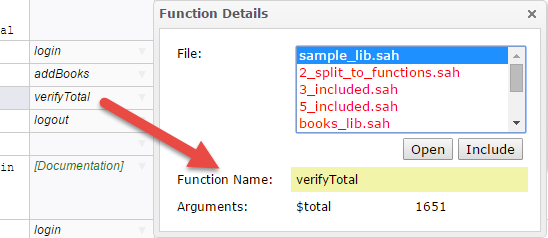
3. Function details: Shows all the details about the function that was selected before cliking the button. It shows all the files containing the function. If the file containing the function is not included, you can click on the include button to include the file.
You can also press CTRL and click on the function name to see it's details.
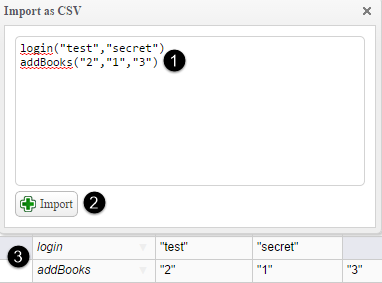
4. Import: Imports functions to the csv. Enter the functions that you want to import in the text area with proper arguments. Click on the import button to insert the functions in the scenario file.
Documentation tool
Sahi can be used as a documentation tool as well. While scripts can be recorded in documentation mode, documentation for already existing scripts can be generated by clicking on View Doc button. A new tab will open where the documentation can be edited and exported as HTML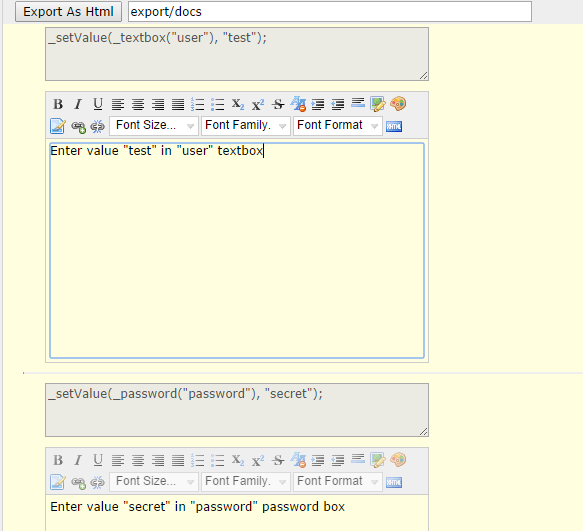
Playback
Script Editor enables playback of scripts/suites/data driven suites. Scripts can be played back on a single machine or distributed across machines.To configure playback properties, click on the Playback button in the top menu. It opens up the basic configurations required for the script execution.
-
If the user has selected some scripts/suites in the Navigator, and clicked on Playback, Sahi will automatically create a suite (selectedScripts.suite) containing the selected scripts/suites, and selectedScripts.suite will be chosen for playback.
-
If the user has selected one script/suite in the Navigator, that individual script/suite will be chosen for play back.
-
If no scripts have been selected in the Navigator, the script or suite file that is currently open (in focus) in the Editor will be chosen for playback.
Based on the playback properties set by the user, Sahi will execute the appropriate script or suite.
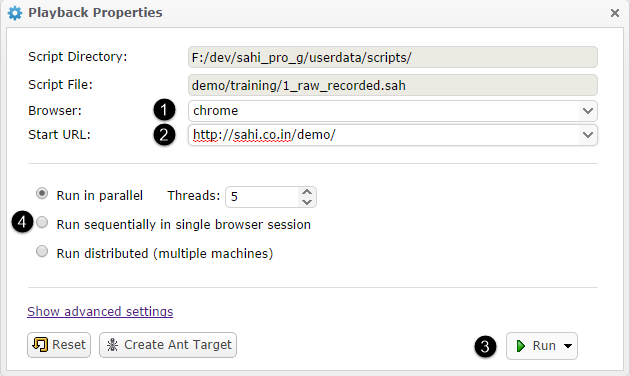
At the very minimum, you need to provide a start URL and browser name to execute the script. Script directory and script file fields show the file for which play button was clicked.
1. You can select the browser from the dropdown. This lists all the browsers configured on your machine. In case you are providing multiple nodes for distributed playback, this will list browsers from all nodes. One can choose more than one browser to run the script/suite in.
2. Provide a start URL for the script.
3. Click on the Play button to play the script. The default setup (Run in parallel with Threads as 5) lets you run the scripts in parallel with 5 simultaneous instances.
4. If you wish to run the scripts in the suite one after another within the same session, select "Run sequentially in single browser session".
5. If you wish to run the scripts in the suite one after another but in different browser sessions, select "Run in parallel" with Threads as 1.
Distributed Playback
Playback properties can be configured to distribute script execution across multiple machines.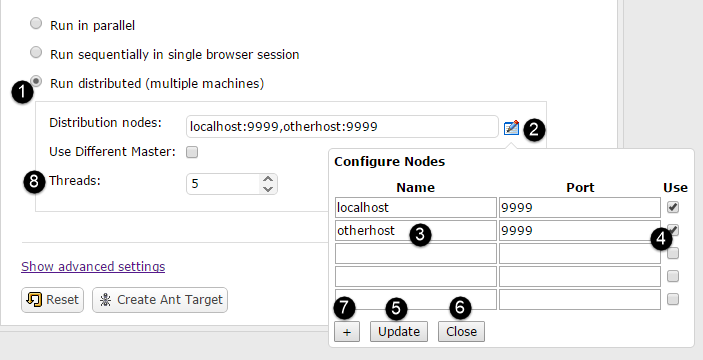
1. To distribute the playback across multiple machines, check the Distribute checkbox.
2. Click on the button to configure nodes for playback.
3. Provide the machine name and port number.
4. If you want to use the node for execution, check the "Use" checkbox for the node.
5. Click on Update button. This updates the node information for execution.
6. Click on Close button to close the node configuration window.
7. This allows you to add more space for additional nodes.
8. You can configure the capacity of distribution nodes by setting the value here.
After configuring the nodes, you can click on play to execute the script or suite across machines.

1. By default Sahi will consider the localhost as the master node. If you want to use a different master, click the checkbox for Use Different Master.
2. Provide the machine name to be used as the host.
3. A default value of 9999 is present for port. If you are using a different port, you can update it here.
Advanced Playback Settings
While setting playback properties, following advanced settings can be configured by clicking on the "Show Advanced Settings" link.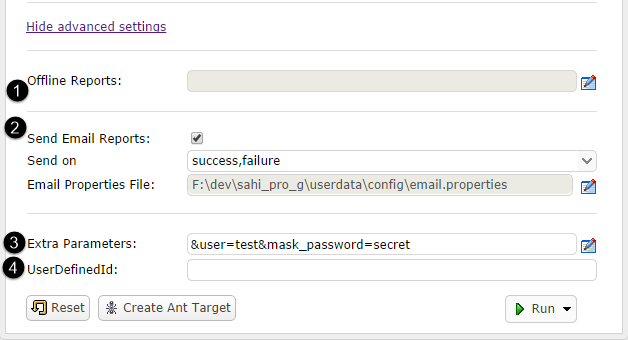
- Offline Reports: You can configure the storage of offline logs by setting the paths for various types of reports.
-
Click on the button to bring up the Logs Info Editor.

-
Provide the location for storing the logs.
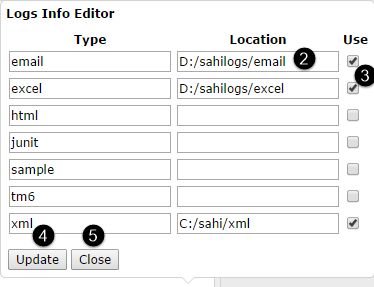
- Unless you click on Use, the settings won't be considered. Click the Use checkbox for the type of logs that you want.
- Click on update to update the Offline logs settings.
- Once updated, you can close the Logs Info Editor.
-
Click on the button to bring up the Logs Info Editor.
- Send Email Reports:
You can enable sending email reports after script run on Success, Failure or both.
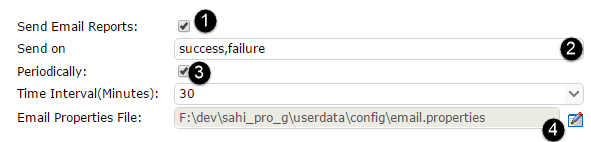
- Click on the checkbox to enable sending email reports.
- Select the trigger for sending email reports. It can be either success or failure or both.
- Periodic emails: For a long running suite, users can configure emails to be sent periodically while the suite run is in progress.
Click on checkbox for sending out periodic emails. In the dropdown below, select the time interval at which the email should be sent. - Sahi uses the properties file present at
userdata/config/email.propertiesto send the emails. You can click on this button to edit the email.properties file. You can change the properties file using other text editor as well.
danger The user needs to edit the email.properties and set the various properties. By default, none of the properties are set.
- Extra Parameters: You can pass extra parameters to script or suite before playback in form of key value pairs. These values can then be used within the scripts.
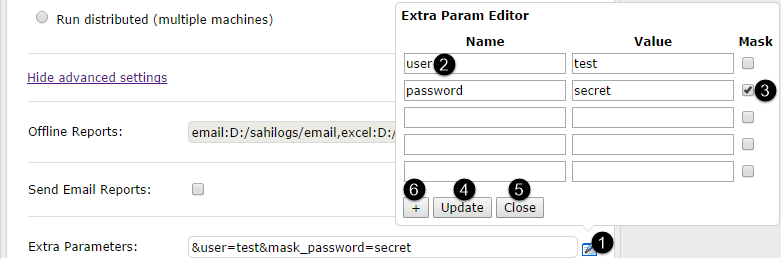
- Click on the button to open Extra Param Editor.
- Provide the name and value for the parameters.
- Click on Mask checkbox to hide the values of parameters from logs. This is useful for masking information like passwords.
- Update button populates the parameters and their values in Extra Parameters text box. This will be then passed on to the script.
- Click on close to close the Extra Param Editor.
- If you would like extra space for parameters, you can click the button to add an extra row.
- User Defined Id: You can provide a unique ID to be used as User Defined Id for the script//suite run.
This can be displayed in any type of log by changing
to<xsl:param name="showUserDefinedId" select="'false'" />
in the suites_list.xsl of userdata\config\reports\<xsl:param name="showUserDefinedId" select="'true'" />. can be html, xml etc
Scheduling a Test
Tests can be scheduled to be executed on a future date using the Editor. To schedule the a script, open playback properties for the script and hover on the Run button. ClickSchedule button from the dropdown.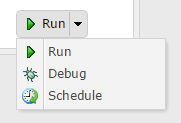
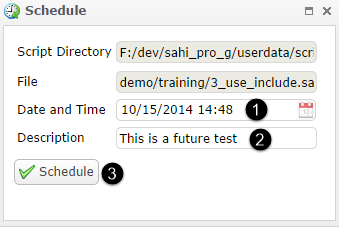
- Choose a date and time from the dropdown. Click OK to set the date.
- Provide a description(optional) for the test.
- Click on Schedule to schedule the test.
 Once scheduled, you will receive the above confirmation on the editor at the bottom right corner.
Creating suites
You can select scripts from the navigator and select Suite or Data driven suite from the Create Suite Dropdown at top. This will create a new suite which consists of the selected scripts.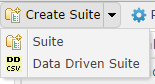
Editor Shortcuts
| Shortcut | Explanation |
| CTRL + S | Save current file |
| ALT + Up Arrow | Move current line up |
| Alt + Down Arrow | Move current line down |
| CTRL + D | Delete the current line |
| CTRL + F | Search in script |
| CTRL + / | Comment selected lines |
| CTRL + ALT + Up Arrow | Copy current line above |
| CTRL + ALT + Down Arrow | Copy current lown on next line |
| CTRL + L | Opens a dialog box to enter line number. Enter line number and press enter to go to line. |
Debugging Sahi Scripts
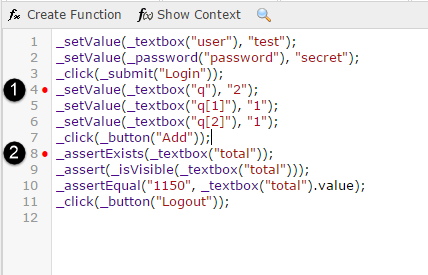
You can add breakpoints in your script before playback by clicking near the line number on the left of the script editor.
A red dot appears to indicate the breakpoint. In the following image, 1 and 2 are the breakpoints.
The breakpoints will only be considered when the script is executed in the debug mode. To execute in debug mode, select the
Debug option from the dropdown next to Run button in Script Editor.
When that script is executed from the editor, it will reach the breakpoint and pause the playback. Sahi controller will launch at that point and then you can go to playback tab and either step over next lines or click on play to resume playback.
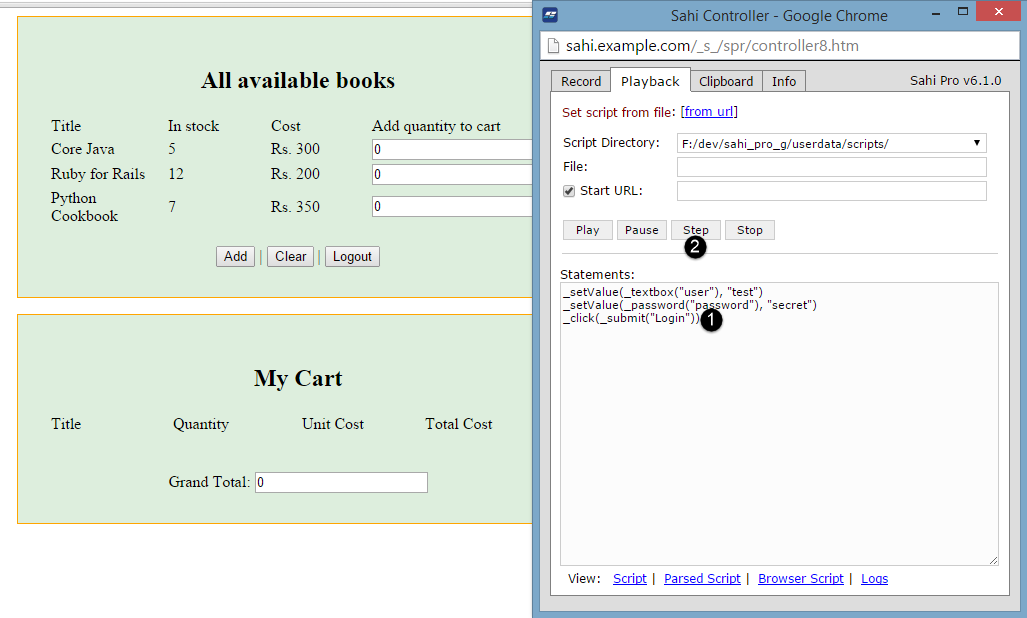
1. In the above image, the script is paused at breakpoint number 1.
2. Click on step to execute next statement.
To clear all breakpoints across all scripts, you can click the 'clear all breakpoints' button in the script editor. This button can be found in the top menu.