


401 Authentication
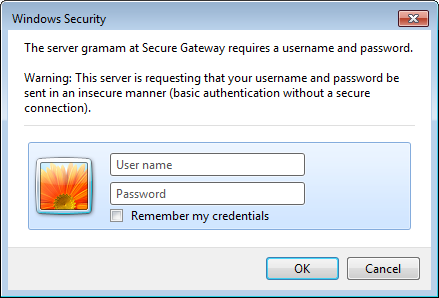
On Internet Explorer, it looks like this:
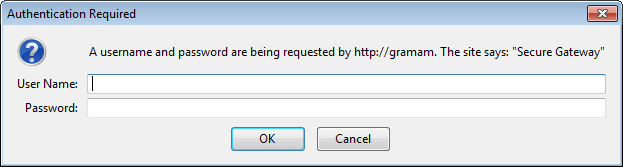
 On Chrome, it looks like this:
 On Firefox, it looks like this:
 However, when navigated to the same site, Sahi automatically transforms this modal dialog into a simple web page.
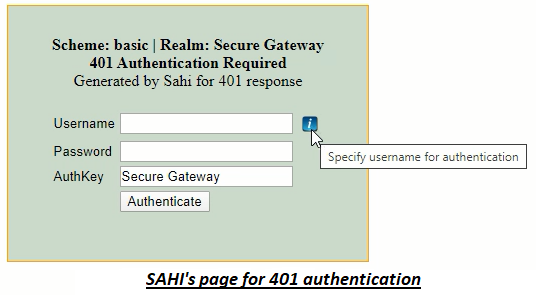 Since it is now just another HTML page, you can easily write scripts to enter username and password into the dialog.
/Secure/ instead of Secure Gateway in the AuthKey field above.
To accept for any AuthKey one can use /.*/.
Try setting AuthKey to /.*/ before troubleshooting further.
To change the version of Java that Sahi Pro uses, edit
sahi/userdata/bin/setjava.bat (or setjava.sh)
and modify
set SAHI_JAVA_HOME=C:\path\to\java1.8401 authentication page for NTLM scheme loops or does not login even if the credentials are provided
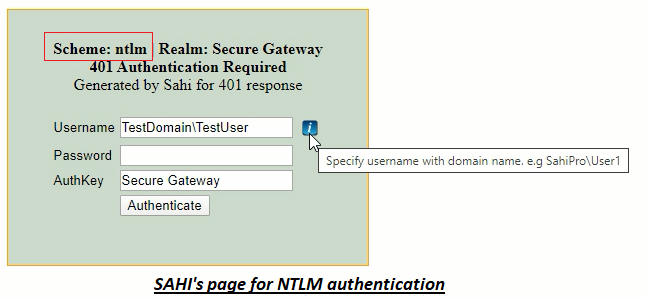
Sahi automatically tries to authenticate the WINDOWS logged in user for the applications which support NTLM scheme. However if Sahi is unable to authenticate the user automatically, the 401 page for NTLM authentication is displayed.
The solution would differ based on your environment. Thus to address this, employ below approaches one by one:
- First approach :
- Sahi automatically populates the username for the currently logged in user. However if you use different credentials for authentication, kindly enter them.
- Ensure that the username is in domain\user format where both the domain name and user name are correct.
- Provide your password for authentication in the password field and click on the Authenticate button.
- Second approach :
-
If the first approach did not work, then ensure that following property is enabled in the userdata.properties file :
apacheclient.enabled=true -
Add the following property in the userdata.properties file:
apacheclient.ntlm_authentication.enabled=true - Restart Sahi and then launch your application in the browser.
- Now enter valid credentials for authentication as done in the first approach.
Sahi authenticates automatically but the username is improper
Sahi automatically tries to authenticate the WINDOWS logged in user for the applications which support NTLM scheme. If successfully authenticated, Sahi's 401 authentication page will not be displayed. However you may wish to use different credentials i.e credentials of a user other than the currently logged in user.
To address this, follow below steps :
-
Add the following property in the userdata.properties file:
java.ntlm.transparent_authentication.enabled=false - Restart Sahi and launch your application.
- Now enter valid credentials for authentication. Ensure that the username is in domain\user format where both the domain name and user name are correct.
- Provide your password for authentication in the password field and click on the Authenticate button.
-
If it did not authenticate successfully, then ensure that following property is enabled in the userdata.properties file :
apacheclient.enabled=true -
Then add the following property in the userdata.properties file:
apacheclient.ntlm_authentication.enabled=true - Restart Sahi and try again.
Handling 401 authentication page for NEGOTIATE or KERBEROS scheme
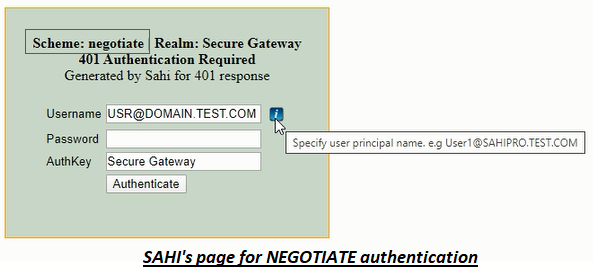
Sahi automatically tries to authenticate the user for applications which support only NEGOTIATE or KERBEROS scheme. However if Sahi is unable to authenticate the user automatically, the 401 page for authentication is displayed.
To address this, follow below steps :
-
Verify if
apacheclient.enabledproperty is set as true in the userdata.properties file. If this property is set as false, set it as true. Restart Sahi and try again. - If Sahi was unable to authenticate automatically even after enabling
apacheclient.enabledproperty, disable this property by setting it as false. - Now Sahi's 401 page for authentication is displayed. Enter credentials in this web page.
-
The username i.e the user principal name would be automatically populated in this web page. You can find and verify your user principal name by running the command
whoami /upnon the command prompt. - Provide your windows login password in the password field and click on the Authenticate button.
- Restart Sahi.