


Sahi - Java Controller
abstract
The Java Controller allows you to interact with Sahi and easily experiment and debug on the browser.
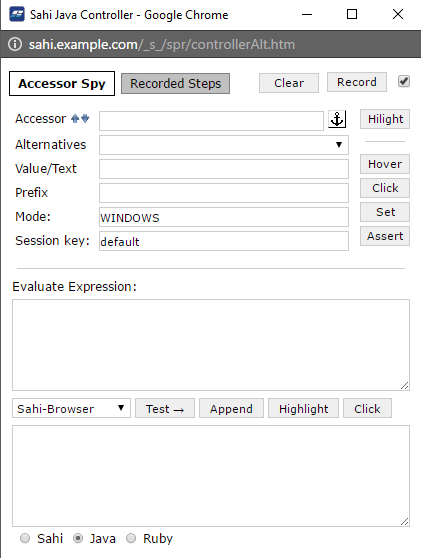
Accessor Spy
Java Controller for Sahi Pro.
Identify Elements
To identify an element, press the CTRL key and hover over any elementModes available in Sahi Pro for recording or identification:
Browser:This mode is always enabled in Sahi Pro. Uncheck the checkbox for recording or identification in Browser mode only.Windows:Check the checkbox to enable recording or identification for Windows. Sahi Pro Desktop Add-on should be installed for this.

Java Applet:For recording or identification in Java Applet mode Sahi Pro Desktop Add-on should be installed.Java Web Start:For recording or identification in Java Web Start mode Sahi Pro Desktop Add-on should be installed.
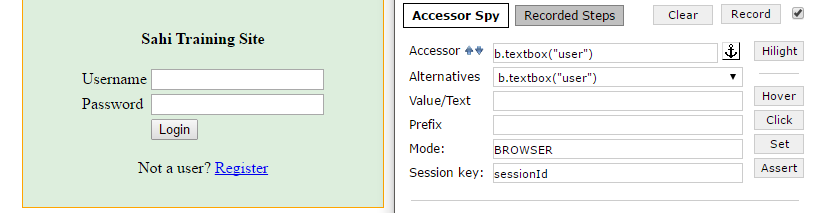
Accessor:shows the Java accessor for that elementAlternatives:shows all alternative accessors for that elementValue/Text:shows the value of the current element. Mostly this is the input text or the visible text.Prefix:Populates the prefix as needed when working with popup windows and multiple domains.
Eg. on a popup window, this may be populated with_popup("New Window")Mode:shows mode of application for which element is recording or identifying (not present in Sahi Pro).
Action Buttons
These buttons perform various actions on the element and also show the generated script in the "Evaluate Expression" box.These are used to quickly work with elements during debugging/script generation.
Clickclicks on the identified element. Invokes the.click()API.Hilighthighlights the identified element (shows a red 1 pixel border briefly). Invokes the.highlight()API.Setsets the value in "Value:" field on the identified element. Invokes the.setValue("")API.Hoverdoes a mouse over on the element. Invokes the.mouseOver()API.Assertassert the behaviour of the system is as expected or not.
Assertions
Assertions are used to verify that the behaviour of the system is as expected.To add assertions using Sahi Java controller,
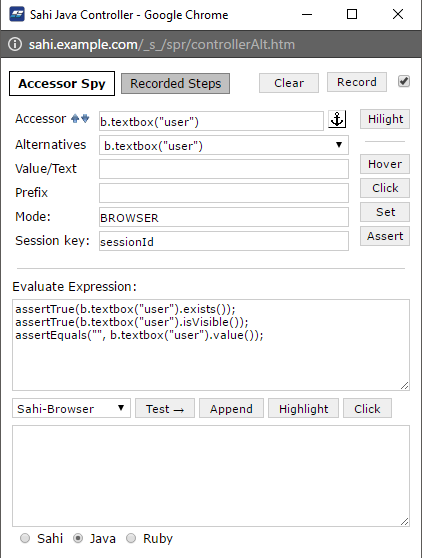
- CTRL-Hover on the element to identify it and then click on
Assertbutton - A few possible assertions for that element will be populated in the
Evaluate Expressionbox - Select mode for evaluate application of which it identified
- Click on Append button to append the assertions to the script.
info
Note: Assertions cannot be evaluated through Java Controller.
Evaluate Expression
Evaluate Expression box is used to evaluate snippets of Sahi Java code. It helps while identifying elements or while debugging.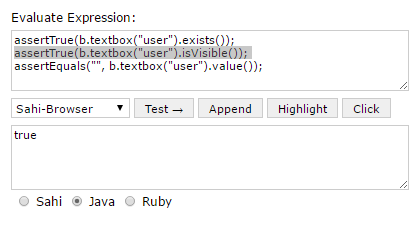
Set mode for evaluateSelect appropriate application mode before evaluate the expression.Test →Put a valid Sahi expression in the Evaluate Expression box and click on Test →. The result will be seen in the bottom box.AppendWhile recording, selecting and clicking onAppendwill append the steps to the currently recording script. This is mainly used for manually append any step from Evaluate Expression to the currently recording script.HighlightCan be used on selected text to highlights the element (shows a red 1 pixel border briefly). Invokes the.highlightAPI.ClickCan be used on selected text to click the element. Invokes the.clickAPI.
info
Note: Selecting some text and pressing "→" will only evaluate the selected text. User may evaluate more than one statement at a time.
Record a script
-
Choose the type of application for recording or identification.
-
Click on 'Record' button and perform desired actions on the web page.

-
Click on 'Stop' button to stop recording.
-
Then click on 'Recorded Steps' button and it will show all the recorded steps.
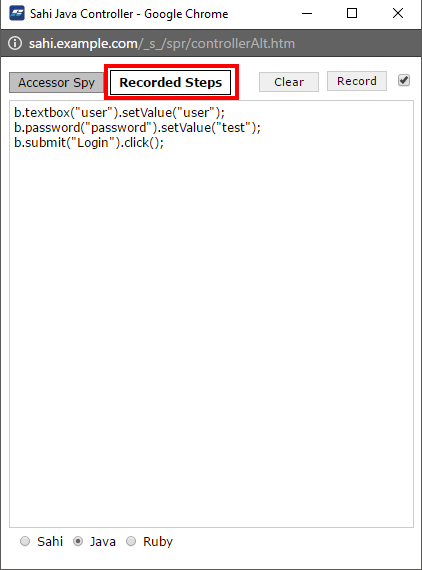
-
'Clear' button is used to clear all the recorded steps.